As sandbox solutions are deprecated, SharePoint 2013 brings a new capability called “Apps” to extend SharePoint with client-side code. Although the conventional SharePoint solution approach (Full Trust) is still there, Microsoft encourages the usage of Apps. Everything is an App, including Lists and libraries, Web Parts, etc.
This implementation guide walks through the steps of configuring apps for SharePoint 2013/2016.
To configure SharePoint 2016 for Apps, you can follow these steps:
Steps In Summary:
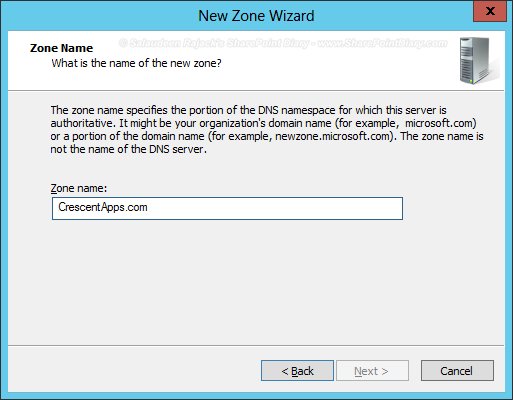
As SharePoint 2013 apps work on their own domain, we need to create a new domain in the DNS server. So, let’s create a new domain in DNS, say CrescentApps.com. Login to your DNS server and create a new Forward Look-up zone.
Create a Wildcard (*) CNAME in CrescentApps.com, Point it to your SharePoint site: SharePoint.Crescent.com(Assuming there is a HOST A Record: SharePoint.Crescent.com is already created)

Verify that the zone created successfully by pinging it. Type in command prompt:
Ping MyApp.CrescentApps.com
It should get the reply from SharePoint.Crescent.com.
Go to Central Admin >> System Settings >> Manage services on server >> Start these two services :

Then, two service applications need to be created. The App Management service can be created via Central Administration, but the Subscription service application can’t.
Create App Management Service Application
Go to Central Admin >> Application Management >> Service Applications >> New >> App Management Service. Provide necessary parameters and create a new App Management service application.

Subscription settings service application can be created only with PowerShell, and there is no Central Admin UI!
#Get the managed account to use. $account = Get-SPManagedAccount "Crescent\SPSvcServApp" # Create New application pool for the Subscription Settings service application. $AppPoolSubSvc = New-SPServiceApplicationPool -Name SubSettingsServiceAppPool -Account $account # Create Subscription Settings service application $AppSubSvc = New-SPSubscriptionSettingsServiceApplication -ApplicationPool $appPoolSubSvc -Name SubSettingsServiceApp -DatabaseName SubSettingsServiceDB # Create a proxy for the Subscription Settings service application. $proxySubSvc = New-SPSubscriptionSettingsServiceApplicationProxy -ServiceApplication $appSubSvc
You can verify the subscription service application created from the central admin:

Configure the App URL
Go to Central Admin >> Apps >> Click on App URL under App Management, Specify App Domain (Say: CrescentApps.com) and App Prefix (say: App)

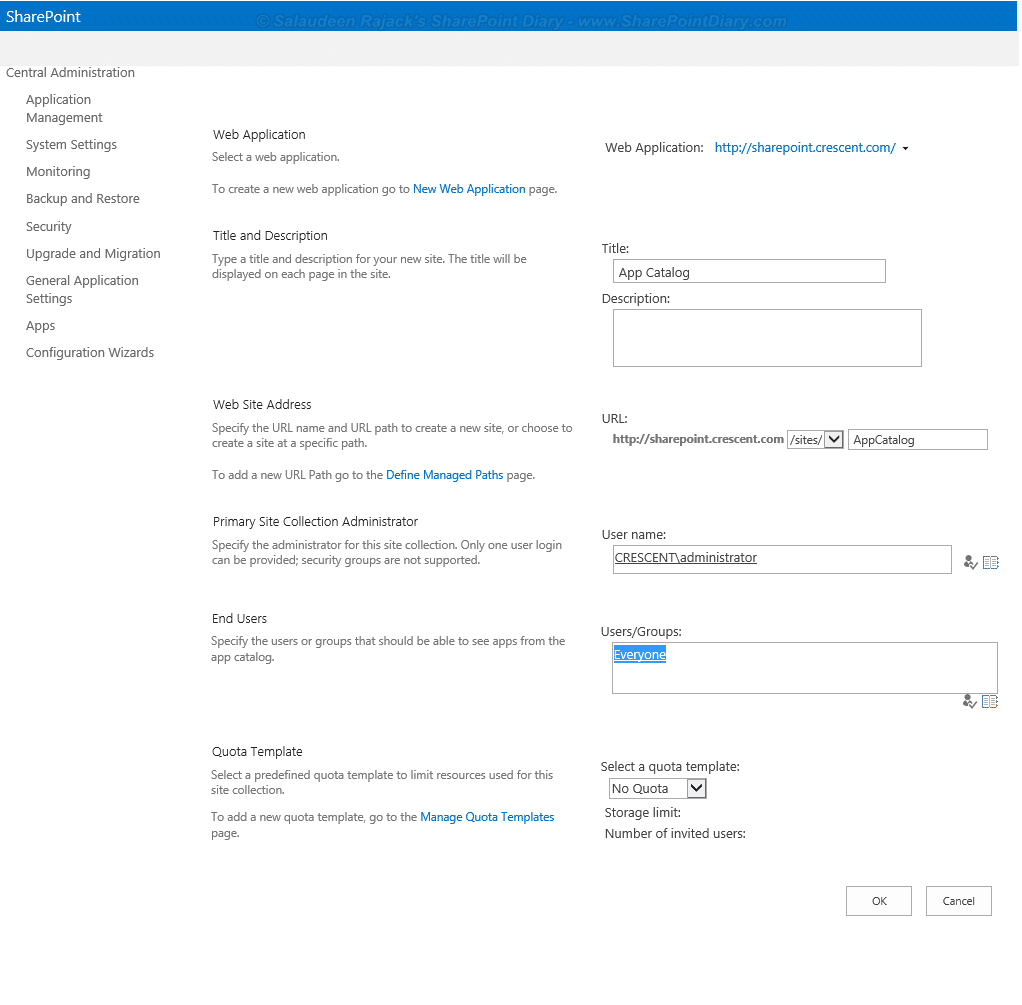
Configure App Catalog – The App catalog is the repository for Apps. In other words, it’s actually a site collection on the web application that hosts the apps.
Go to Central Admin >> Apps >> Manage App Catalog >> Pick the relevant web application and create a new SharePoint 2013 app catalog site.

Grant access to “NT Authority\Authenticated users” under the End-users section. That’s all we’ve configured in the SharePoint 2013 app environment.
Install Apps:
Go to your App Catalog site and click the “SharePoint Store” link from Quick Launch.
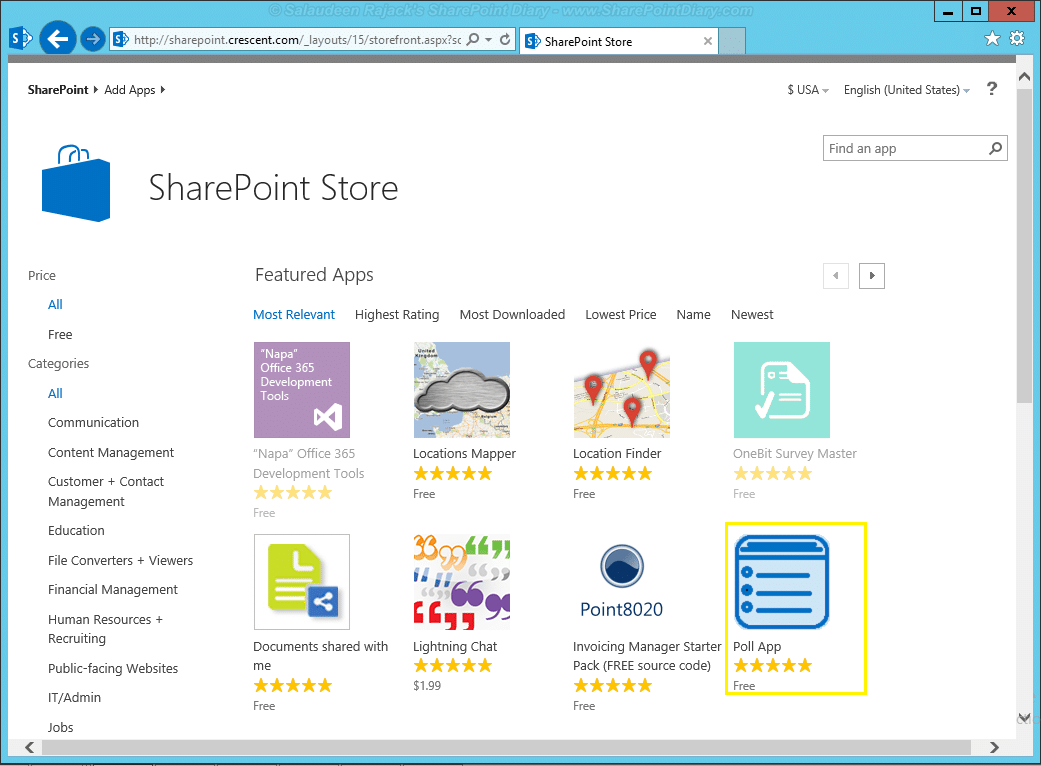
Pick the desired application and Add the App. You may be prompted to log in with your Microsoft account (Hotmail/Outlook.com/Live)
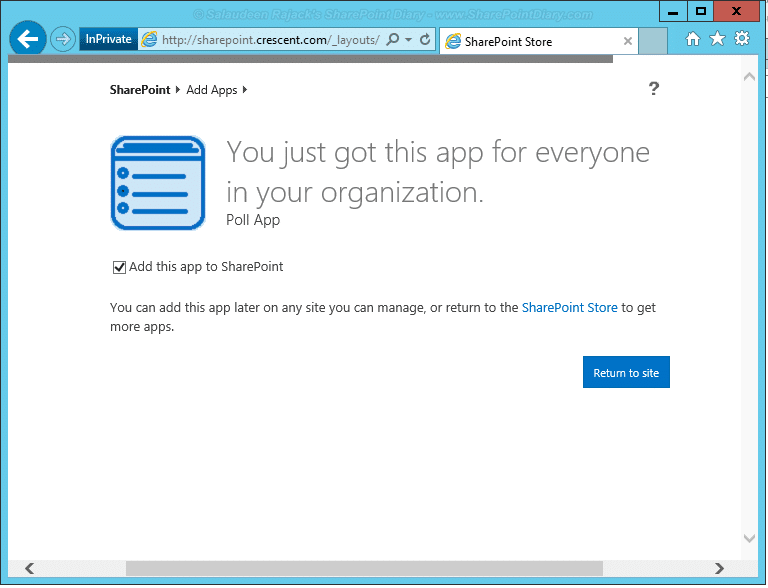
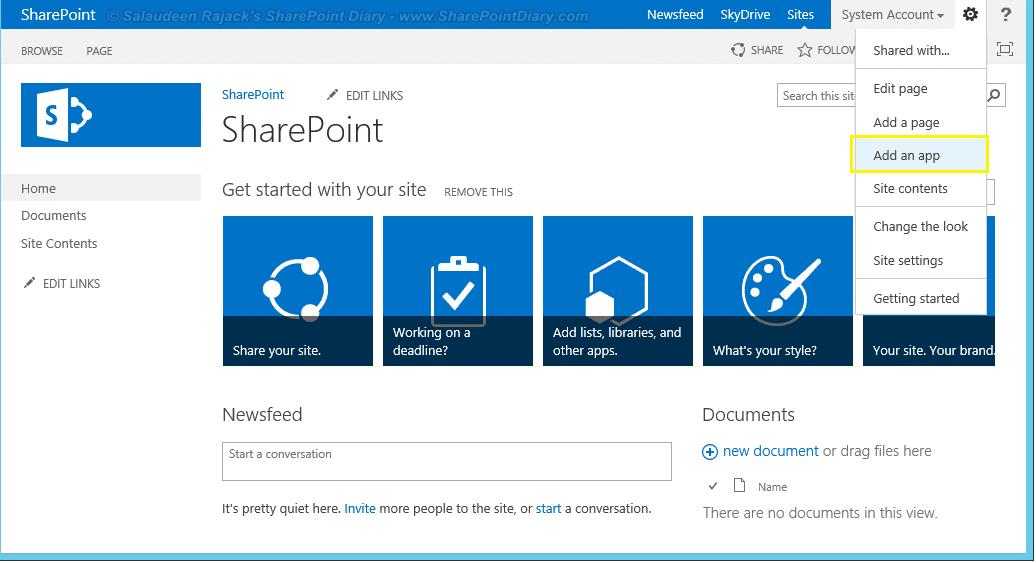
Once installed, you can add that app to your SharePoint sites by clicking “Add an app” from the site settings menu.
Pick the desired app to create a new instance of it.

Let’s try this again Error Message:
You get this error message when trying to install a new App.
Lets try this again…
Everything is fine, but we had a small problem getting your license. Please go back to the SharePoint Store to get this app again and you won’t be charged for it.

Solution: Don’t Install apps with the Farm Admin account (or System account). Log in with an account apart from the Farm Admin account and install again!
HTTP 404 The Web Page Cannot be Found error:
If you use path-based site collections with a host header (which is other than the machine name), it results in a page that cannot be displayed and an error when you try to add apps.
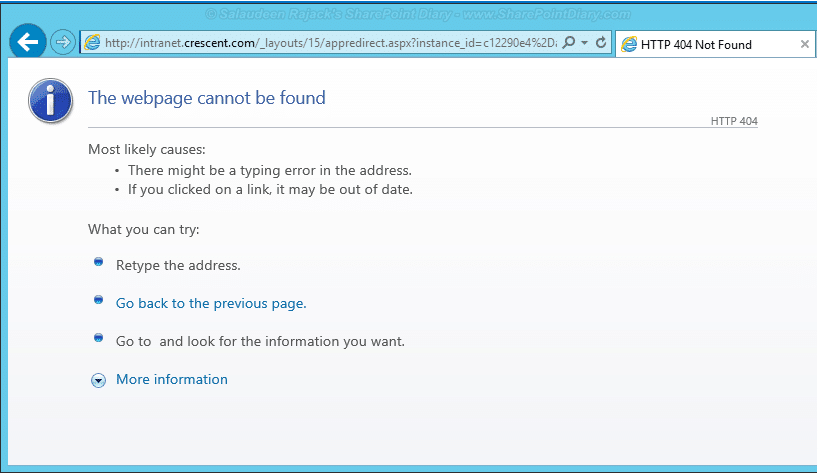
Solution: Create a web application without host headers on Port 80! Also, Stop/Delete the Default Website from IIS. This can happen for reasons such as a forward lookup zone not being created, your app domain settings in Central Admin being wrong, etc.
To create a new web application using PowerShell:
$ap = New-SPAuthenticationProvider New-SPWebApplication -Name "SharePoint - 80" -ApplicationPool "SharePoint 80" -ApplicationPoolAccount (Get-SPManagedAccount "Crescent\Administrator") -Port "80" -AuthenticationProvider $ap -AuthenticationMethod NTLM -DatabaseName "WSS_Content_default"